How to Create A Fishbone Diagram on Powerpoint

The fishbone diagram or Ishikawa diagram is a cause-and-impact diagram that encourages managers to find the explanations behind flaws, variations, deformities, or disappointments.,nbsp;
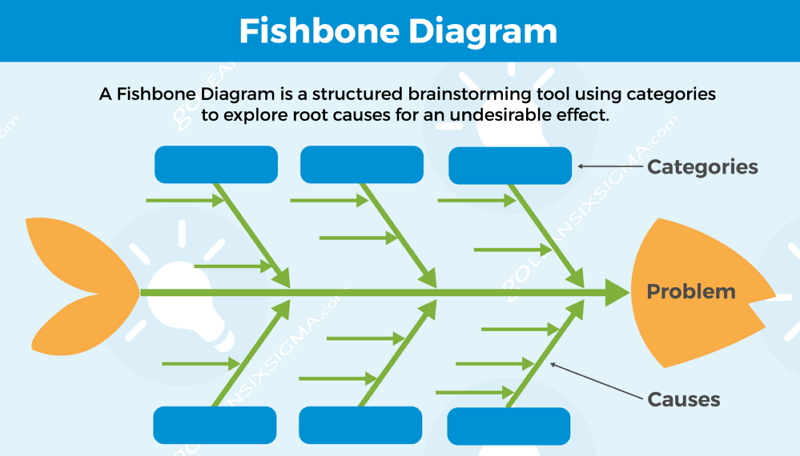
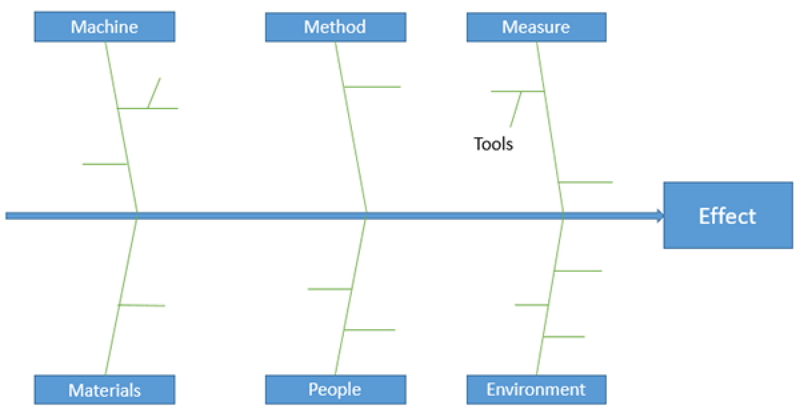
The diagram looks like a fish's skeleton. The main issue at its head and the causes for the issue taking care of into the spine. When all the reasons that underlie the issue have been recognized, managers can begin searching for answers to guarantee that the item doesn't turn into a repetitive one.
Fishbone diagram distinguishes and composes the potential causes of a business issue. It uses a simple and justifiable format that helps to identify the wellsprings of procedure variety. It is also called the Ishikawa Diagram and Cause and Effect Diagram.
Concept maps work very well for classes or substances with visual components or when it is critical to see and comprehend connections between various things. They can likewise be utilized to dissect data and thoroughly analyze.,nbsp;
- Fishbone also recognizes the causes of a bothersome impact of an issue;
- It is additionally conceivable to recognize the chain of command of causes, including the likely root causes;
- Points out the essential variables influencing the quality of a product or administration.,nbsp;
These components should be enhanced to decrease the measure of procedure variety. The result can give introductory information to later critical thinking devices.
Source: Pinterest
1.1 The Usages of Fishbone Diagram
The diagram format is used in:
- Venture presentations to grandstand root cause investigation;
- Meeting to generate new ideas for growing new product design;
- Review meetings for Quality deformity counteraction and so forth.,nbsp;
The device's fundamental advantage is that it encourages you to investigate all the potential causes for an occasion without inclinations. It is a diagram you should have available to you if you make vital or authority related presentations.
If you've attempted to make diagrams in PowerPoint, you presumably realize how disappointing it tends to be—we certainly do. That is the reason we've separated the procedure for you. To figure out how to make a fishbone diagram in PowerPoint, follow the steps beneath. Or then again, for a more natural, productive arrangement, jump to the following area to find out going to make a,nbsp;fishbone diagram PowerPoint.
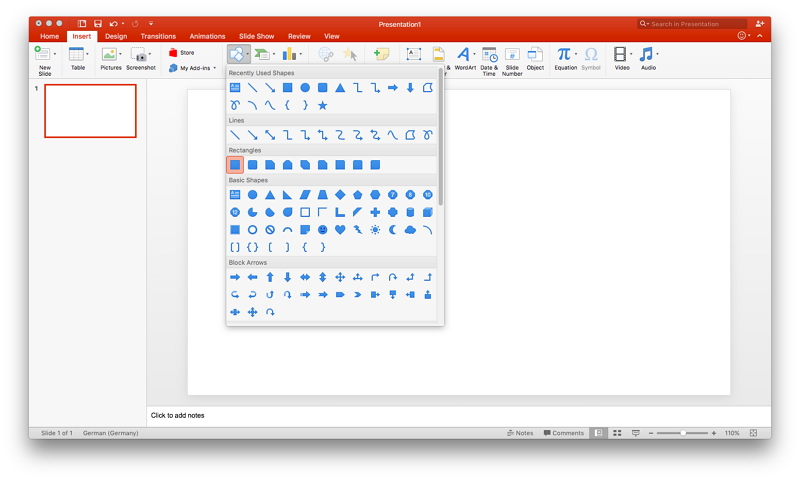
- Find PowerPoint's shape library
PowerPoint doesn't offer any fishbone diagram PowerPoint templates, so you'll need to begin without preparation. The entirety of the shapes that you'll need can be found in PowerPoint's shape library, situated on the supplement tab. Choose "Shapes" to open the library.
To embed a shape or line, select it starting from the drop library, at that point snap, and drag your cursor to draw it on your slide.,nbsp;
Source: Microsoft PowerPoint
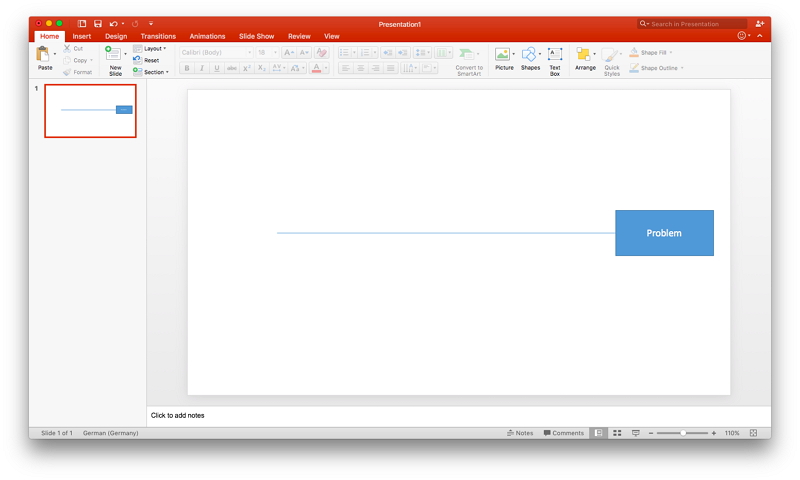
- Draw the "fish head" and "fish spine" of your diagram
Fishbone diagrams are named for their shape, which takes after a fish skeleton, and every component of the diagram is named in like manner.,nbsp;
The head of a fishbone diagram PowerPoint —the furthest right rectangle—contains the diagram's focal problem articulation. Select a rectangle from the shape library and add it to the correct side of your slide. Single-tick the box and start composing to include text (for the present, you can type "Problem" as a placeholder).
When you've included the head, draw an even line reaching out from it to one side—this is your diagram's spine.
Source: Microsoft PowerPoint
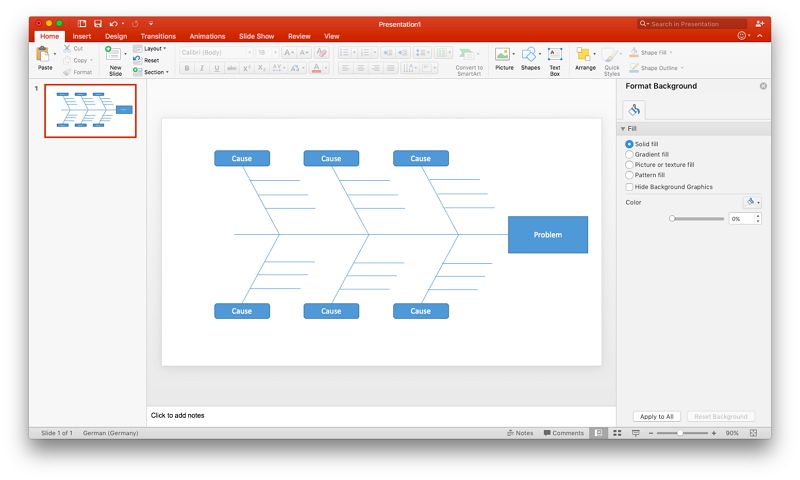
- Include causes and subclauses
Next, draw extra lines stretching out from the middle border at an edge. (These are the "ribs" of the skeleton.) Each of these lines speaks to a cause adding to your problem explanation. Commonly, a fishbone diagram incorporates six of these cause lines.,nbsp;
At the tip of each line, including a little rectangle—these will fill in as labels. Single-tick the rectangle and start composing to include text. As in the past, use a conventional placeholder for the present.,nbsp;
Include flat lines (a few, contingent upon your need) reaching out from each cause line. These lines speak to subclauses.,nbsp;
Now, the structure of your fishbone diagram is finished. On the off chance that you'd prefer to leave it clear to print or save as a template, save your PowerPoint with no guarantees—you can feel free to avoid the rest of the steps.,nbsp;
Source: Microsoft PowerPoint
- Label your fishbone diagram PowerPoint
Since you've completed the structure of your diagram, it's an ideal opportunity to tailor it to your tending problem. Supplant any content placeholders with real substance—this incorporates your particular problem articulation, just as contributing causes.,nbsp;
To label your subclauses, you'll have to include text boxes. On the home tab, select "Text Box." Click and drag to draw and size the content box. Position these labels over each subclause line. (Tip: Once you've included one content box, you can save time by utilizing reorder to add more.),nbsp;
Source: Microsoft PowerPoint
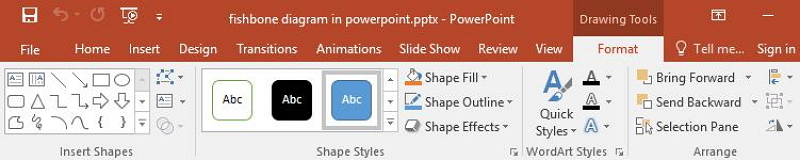
- Format and style your fishbone diagram PowerPoint
As you add shapes to your report, they are styled by Microsoft's presets. In case you're content with how your diagram looks, you can save it and skirt this progression.,nbsp;
To adjust the fill color, murkiness, or other elaborate parts of a shape, double-tap it. It opens the shape formatting sheet. Hold Shift as you click on shapes to choose different—along these lines, they can be altered at the same time. Adjust the visual components of your diagram until you're happy with its look. When you've completed, you're prepared to save your finished fishbone diagram PowerPoint!
Source: Microsoft PowerPoint
Making a fishbone diagram in PowerPoint requires you to invest substantially more energy in drawing the principal structure. Likewise, it requires numerous extra steps to fabricate a total fishbone diagram PowerPoint.
Contrasted and that, utilizing the professional diagram maker - MindMaster is exactly the software you need to make a fishbone diagram without wasting so much time with user-friendly features. With different templates and different images for various diagrams, MindMaster can assist you with making top-notch fishbone diagrams with less time. The following are the steps to create a fishbone diagram in MindMaster.
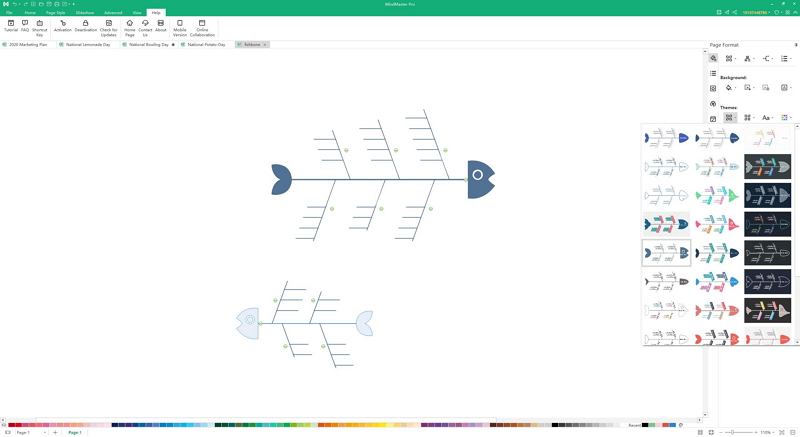
Step 1: open MindMaster online or MindMaster software, and choose fishbone left or fishbone right template.,nbsp;

Source: MindMaster
Step 2: Double-tap the template to participate in the drawing interface, and you will see the image library will spring up on the left side with the goal that you can choose whatever you like and include it into the diagram.
Source: MindMaster
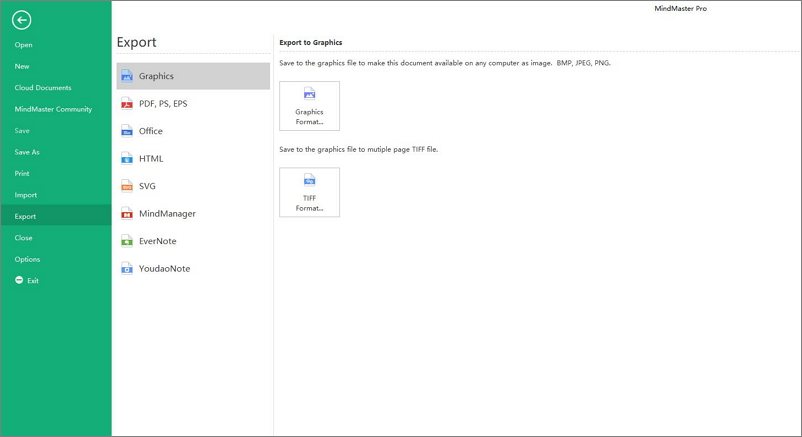
Step 3: Save and export diagrams in multiple formats, including Graphs, PS, PDF, MS Office, etc. You can export in Graph format, then attached to PowerPoint or other reports.
Source: MindMaster
Making the fishbone diagram on PowerPoint is one of the most time-consuming, and looking at the steps above, it can be tricky for the beginners to start building one from scratch. Even more, if someone is meeting deadlines, the best way to not only make a useful fishbone diagram but with little to no time with MindMaster. All one had to do is select a fishbone template and put the information in it.