How to Create a Flowchart in PowerPoint
Edraw Content Team
Do You Want to Create Flowchart?
EdrawMind helps move ideas forward, faster and better. Learn from this guide to know everything about how to create a flowchart. Just try it free now!
PowerPoint is one of the most commonly used platforms to create presentations. People of various niches consider PowerPoint as their first priority in creating free and unique presentations. While surviving in the professional field, you are bound to create illustrative presentations for your ideas, concepts, and works. However, most users feel inappropriately confused over such tasks.
Creating flowcharts across PowerPoint can be both easy and difficult, considering the user's knowledge. To make sure you feel at ease while creating presentations, this article will guide you on how to create a flowchart in PowerPoint.
1. What is Flowchart?
1.1 What is a Flowchart?
Flowcharts are a perfect form of representing business procedures and operations. This illustration is covered with all possibilities for an audience that can understand the process to its roots. This graphical or symbolic representation helps businesses explain their complex procedures with different shapes that have significance in representing the idea.
1.2 Pros and Cons of Flowchart
The advantages and disadvantages of using flowcharts in your business are presented as follows:
Advantages
- Helps present clarity to the viewers about a complex process and its multiple possibilities across a single diagram.
- Analysis of process gets easier with a flowchart which can be effectively improved.
- Paperless documentation is promoted using flowcharts, which exempts the need to review procedures through large documents.
Disadvantages
- Rather than making things easier, it usually gets difficult to explain complex procedures.
- A flowchart with multiple processes does not fit on a single document, which leads to confusion for the audience.
- Flowcharts follow a linear structure, which makes it complicated for procedures with parallel processes.
1.3 5 Main Types of Flowcharts
There are five basic types of flowcharts recognized in the professional market, which are described as follows:
- Swimlane Flowchart:Provides clarity in steps with vertical and horizontal lanes for categorizing organizational units.
- Data Flow Diagram:Helps in displaying the flow of information for a specific process with symbols.
- Process Flowchart:One of the most common forms of the flowchart, it helps display the steps of a project with a sequence of steps for specific decisions.
- Decision Flowchart:Provides the option of visualizing the options available for business decisions with a set of the potential outcomes for a specific decision.
- Workflow Diagram:Representation of flow of work or a process with visualization of the steps.
2. How to Create a Flowchart in PowerPoint
PowerPoint is recognized as a presentation software that helps people make an effective display of their projects. Their presentations, however, are required to be accompanied by diagrams such as flowcharts. This part explains how to create a flowchart in PowerPoint with two expressive techniques, which are displayed as follows:
2.1 Manual Flowchart
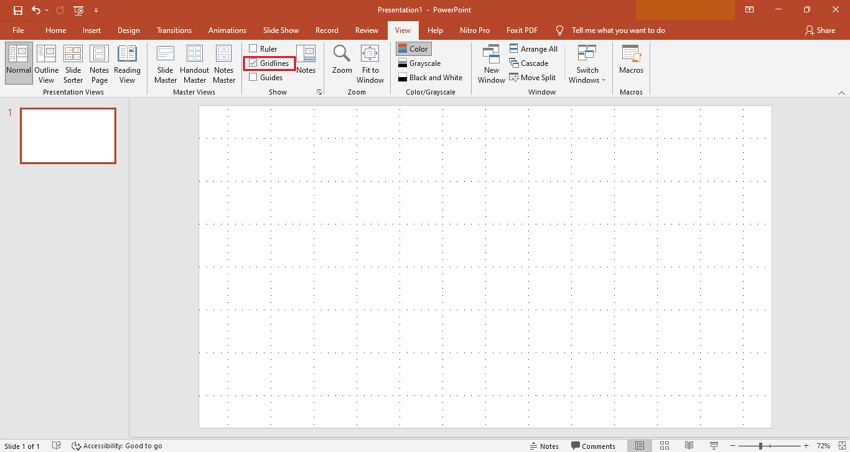
Step 1: Turn on the Grid
Open PowerPoint on your computer and navigate to the "View" tab. Turn on the options of "Gridlines" in the menu to create a better flowchart.
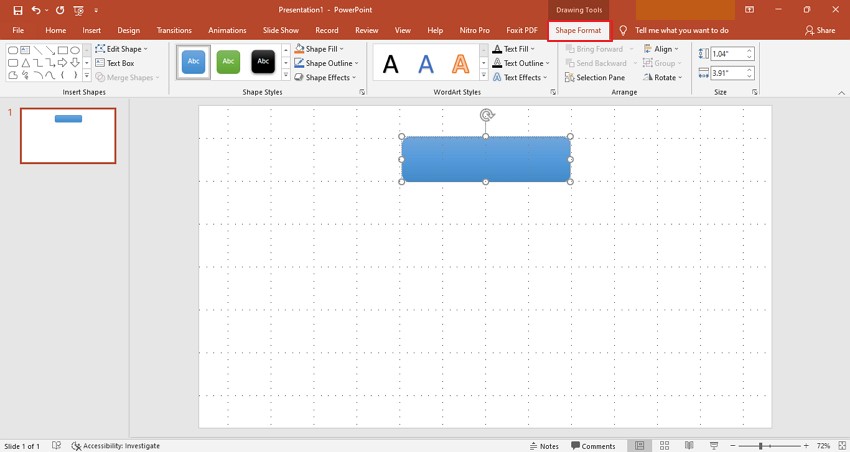
Step 2: Add Shape
Proceed to the "Insert" tab and click on "Shapes." A drop-down menu appears on the screen, out of which you can select any particular shape.

Step 3: Change Shape Characteristics
Move into the "Shape Format" tab on the top menu to change the color, border, and other display characteristics of the shapes drawn for the flowchart.
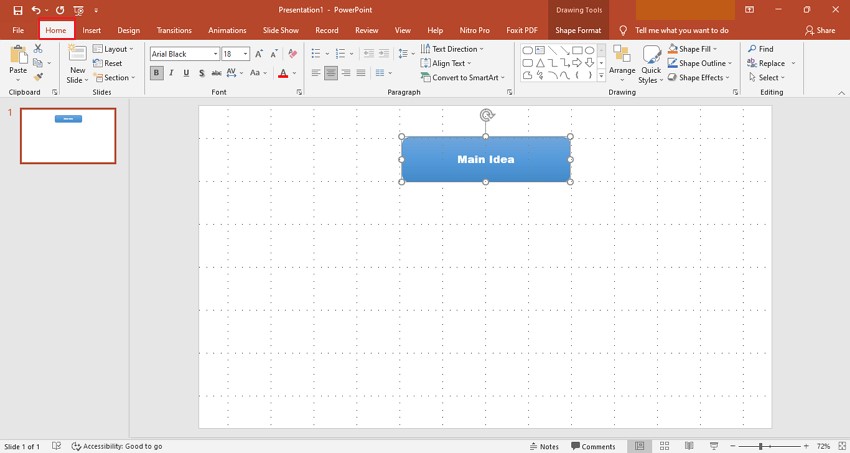
Step 4: Add Text and Customize
To add text to a shape, double click on it. Once added, select the text and open the "Home" tab on your PowerPoint to change the size, color, and style of the added text.
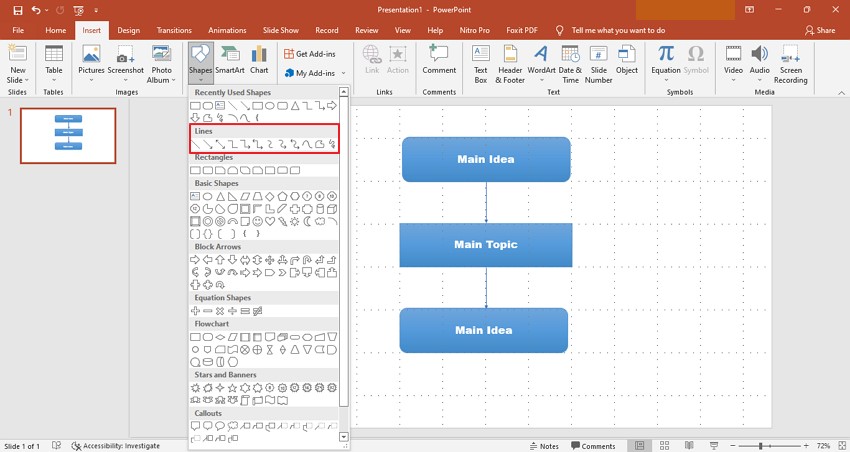
Step 5: Connect Shapes
After adding all shapes for the flowchart, go across the "Insert" tab again and open "Shapes". Select any line or arrow shape from the available list and draw it as connectors to your flowchart.
2.2 SmartArt Flowchart
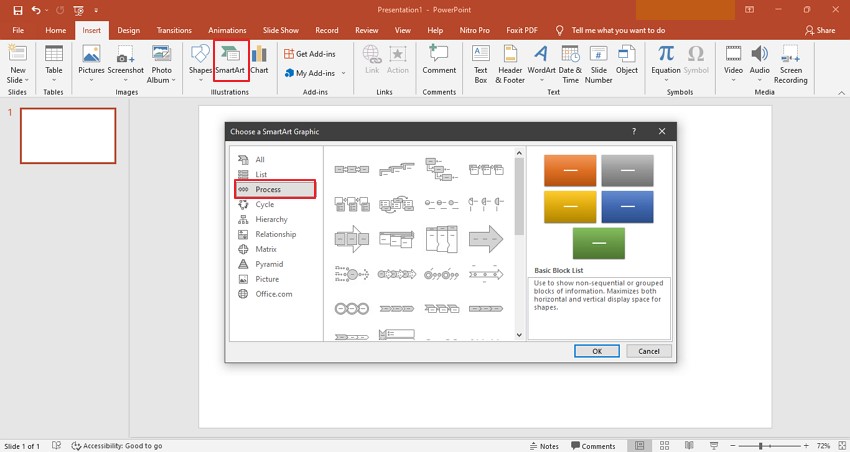
Step 1: Add SmartArt Flowchart
After launching PowerPoint, proceed to the "Insert" tab and click on "SmartArt" to open a new window. Find the flowchart you wish to make using this tool in the "Process Category".
Step 2: Include Text
As you've added a flowchart template, add the text across the boxes through the text pane.
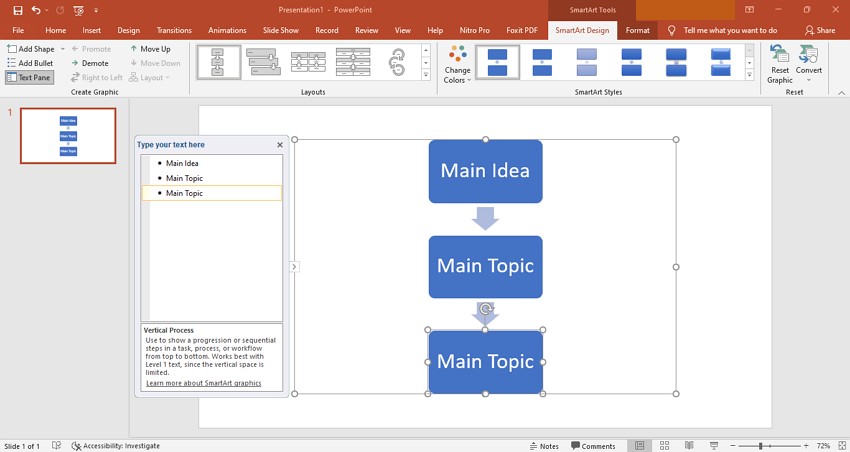
Step 3: Expand the Flowchart
To add a block to the SmartArt flowchart, click on a certain shape and tap "Enter." To add a sub-topic, use "Tab" to add a sub-topic across the flowchart, where required. Once you are done with the structure, go to the "SmartArt Styles" section to customize the flowchart template.

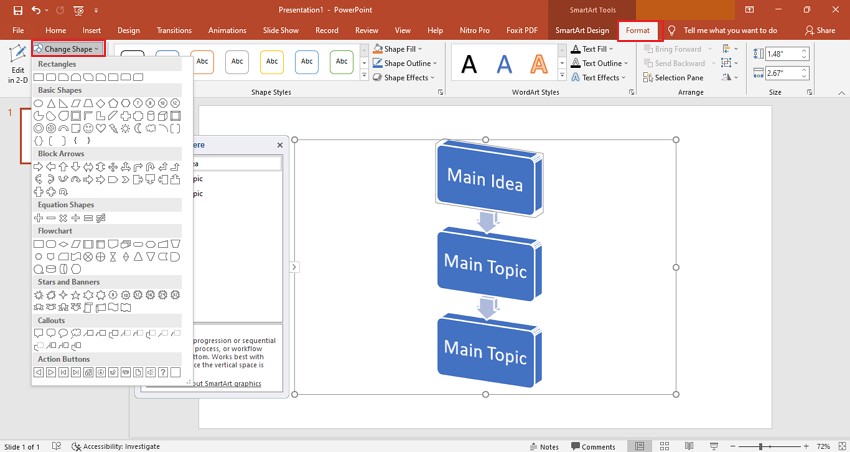
Step 4: Change Specific Shapes
To change the shape of a particular block, select the shape and move into the "Format" tab. Click on the "Change Shape" option and select the shape of your choice.
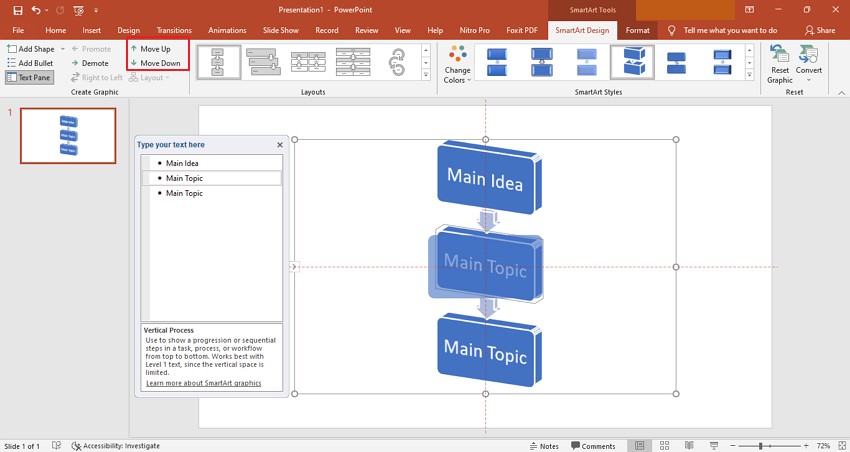
Step 5: Make Changes in Structure
Change the structure of the flowchart with the 'Move Up' and 'Move Down' buttons in the "Create Graphic" section.
3. Limitations of Using PowerPoint to Create a Flowchart
PowerPoint can be quite effective in creating flowcharts for your presentation. It is yet not the best option for this case. While you've understood how to create a flowchart in PowerPoint, there are a few drawbacks to using this specific platform in a professional space. Look across these limitations to broaden your mind about creating flowcharts across PowerPoint:
- You have to work on each step of the flowchart from scratch. Although PowerPoint provides templates to develop flowcharts, you need to set every small detail of the flowchart by yourselves.
- There is negligible flexibility in using PowerPoint to create flowcharts for your presentations. On modifying one shape between the flowchart, you need to work re-do every shape in the process, which amplifies the total time spent on the flowchart.
- You do not have the autonomy to cooperate with your colleagues at the work or project. There are several cases where you have to develop multiple flowcharts for a project, where you may need a team to help you out. PowerPoint does not provide you with a platform to cooperate.
4. How to Create a Flowchart in EdrawMind
EdrawMind provides a perfect alternative to creating a flowchart across its canvas. In an environment that features exceptional tools, the users can execute the process in lesser time. This can be covered by following a set of steps, which are discussed as follows:
Step1 Figuring Out the Template
You need to download the latest version of EdrawMind and install it on your computer. Launch it and select a template that fits your presentation.

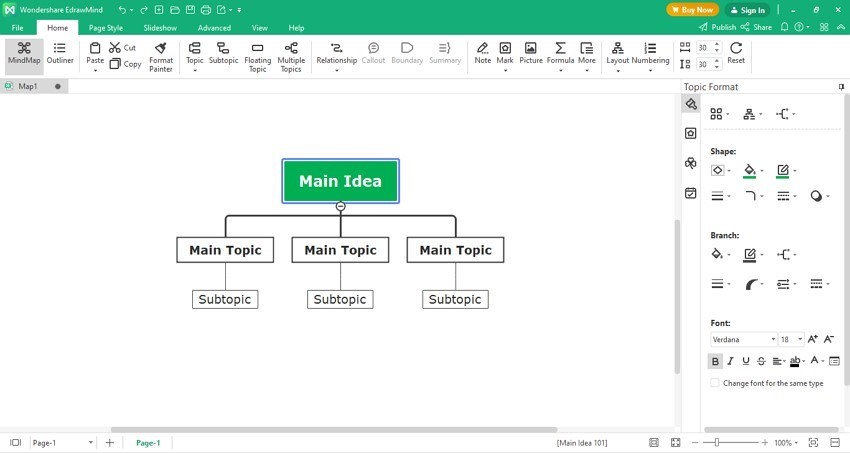
Step2 Edit Flowchart According to Presentation
After selecting a template, you'll be directed to a new window for editing it. Add a "Topic" or "Sub-topic" to your template, where required. To add a Main Topic to your template, tap "Enter" to add it at the appropriate place. For adding a Sub-topic, you need to tap on "Tab" to add it across the selected topic. EdrawMind provides you with opportunities to customize the template with different features.
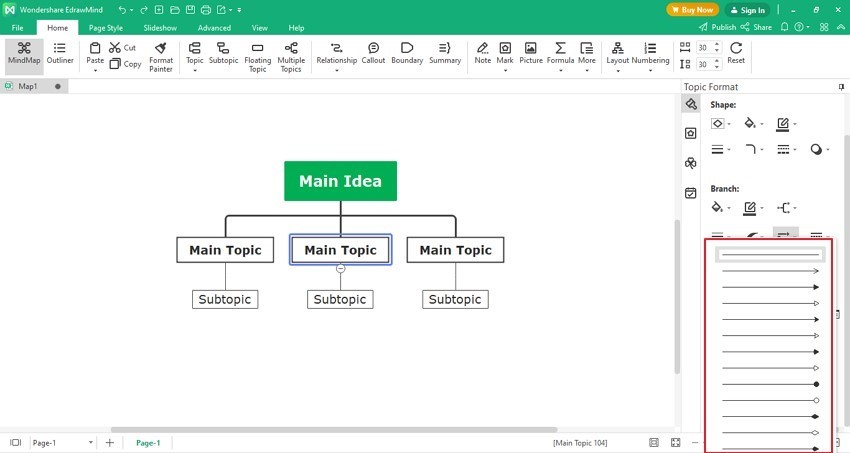
It lets users change the arrowheads or branches of the flowchart. Select any specific block of the flowchart and proceed to the "Branch Arrows" option in the 'Branch' section of the customizing panel. Select any arrowhead or branch according to your requirements. Following this, you can also focus on changing the shapes of your flowchart.
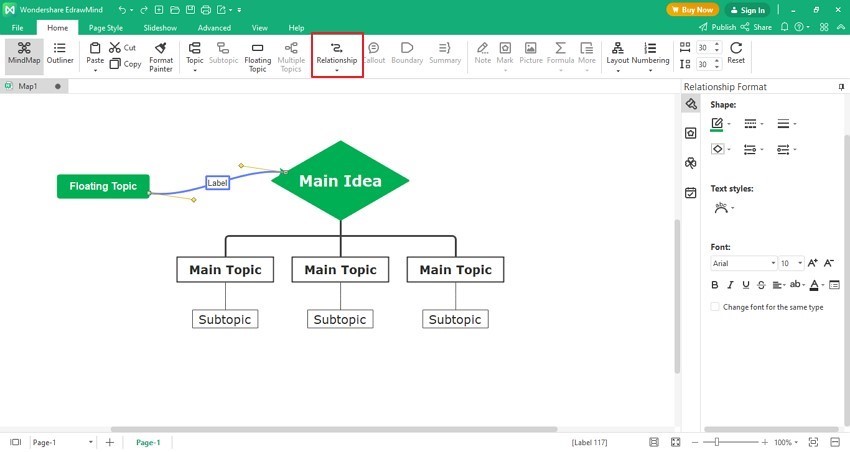
Select a certain block and proceed into the "Shape" section. Look for the appropriate shape from the menu provided in the menu. EdrawMind helps users build connections and relations with flowcharts through "Floating Topic".

Double-click across the canvas to add one. If you want to build a relationship with a topic, select the Floating Topic and find the option of "Relationship" in the top menu. Tap on the other section to set it up. You can also specify the extent of the relationship across the "Label" tag.
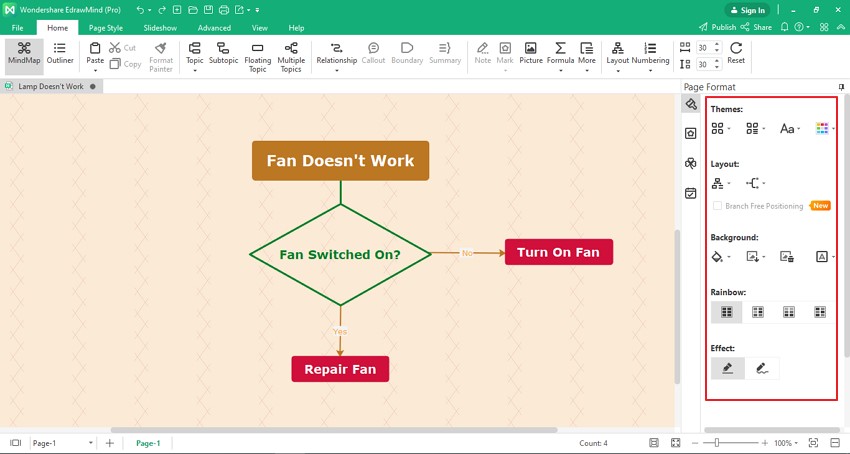
Step3 Customize Theme of Flowchart
Change the style of your flowchart according to your desire. Unselect the flowchart and discover the option of "Themes" in the customizing panel. Select any theme from the menu that opens up and change accordingly.
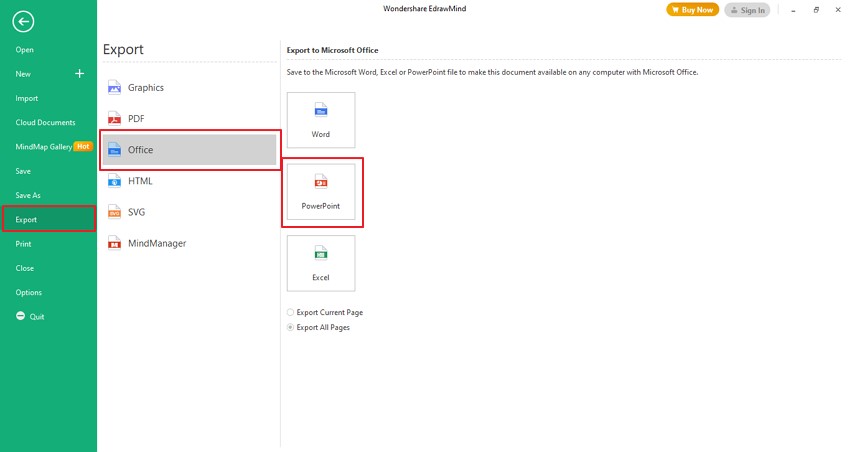
5. Save an EdrawMind Flowchart as PowerPoint File
Once you have customized your flowchart, you need to proceed to the "File" tab and locate the " Export " option across the panel. Click on "Office" followed by "PowerPoint" to export the created flowchart as a PowerPoint file.
6. Templates of Flowchart in EdrawMind
EdrawMind provides you the perfect opportunity to work across a template for setting up your flowchart. There are multiple templates you could look for; however, this article focuses on offering three unique templates that can be perfect for your presentation according to their niche. Look below to know more about them:
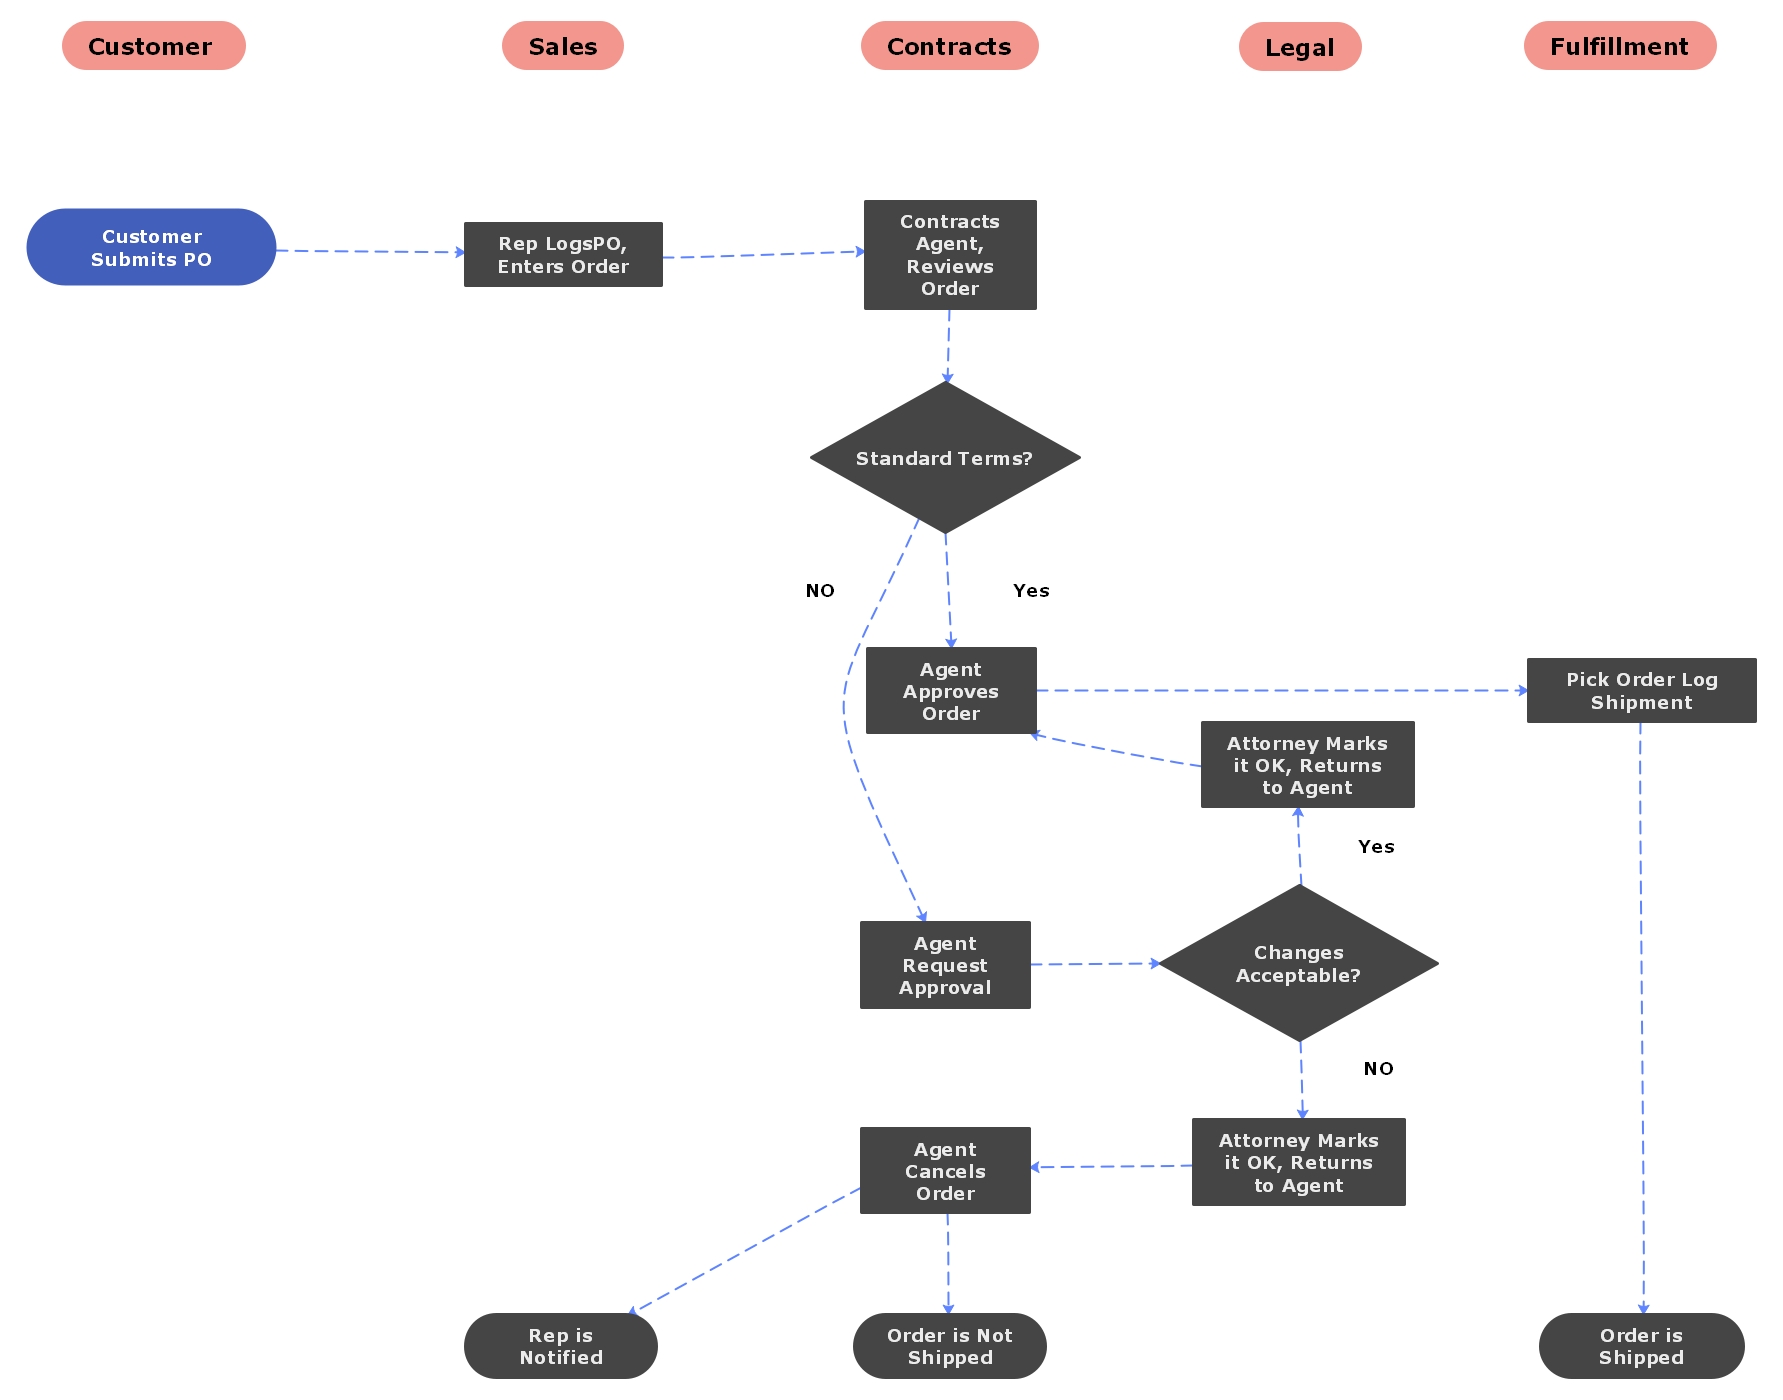
- Cross-Functional Flowchart
![cross functional flowchart]() Click here to download EdrawMind
Click here to download EdrawMind
(For Win)Click here to download EdrawMind
(For Mac)Click here to download EdrawMind
(For Linux)Cross-Functional Flowchart

The use of a cross-functional flowchart deems perfect for business procedures that are to be specified among departments. You can utilize this kind of flowchart to show the procedural explanation of a business process shared between different teams.
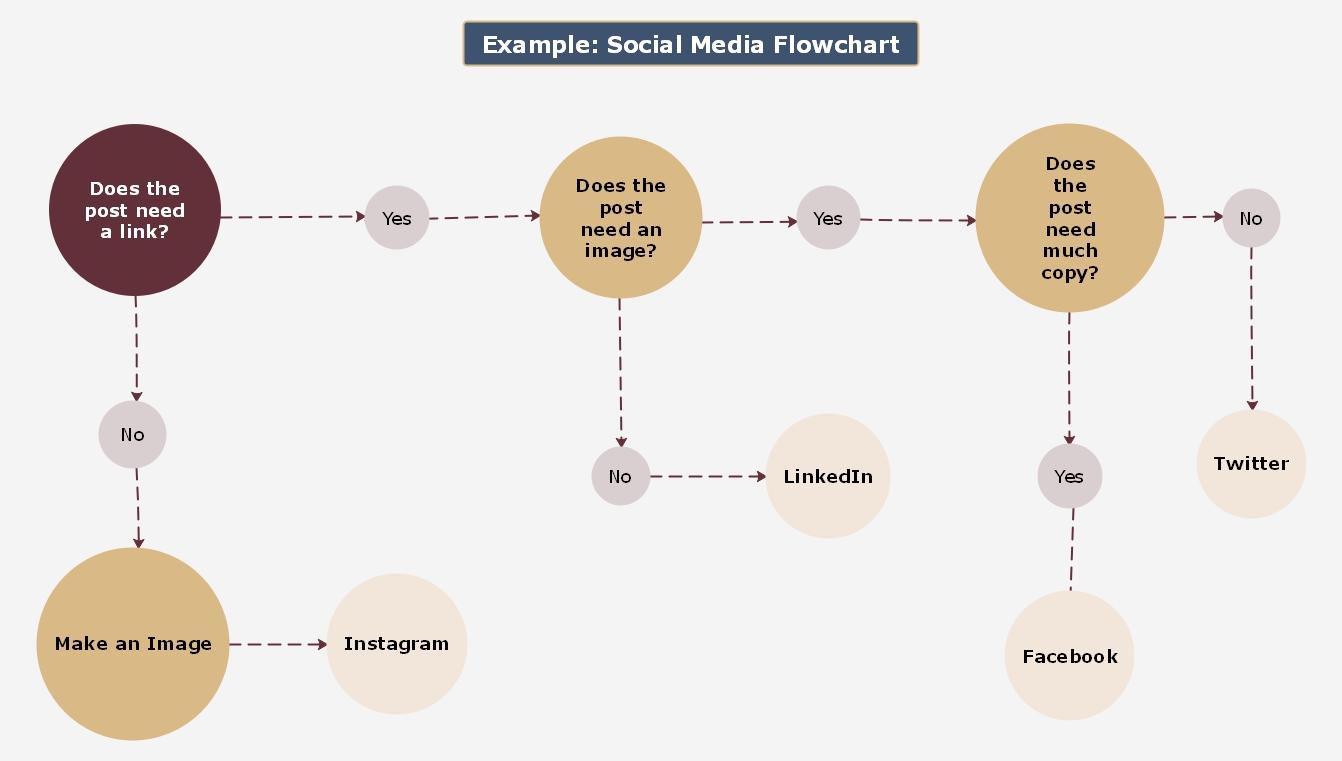
- Social Media Flowchart
![social media flowchart]() Click here to download EdrawMind
Click here to download EdrawMind
(For Win)Click here to download EdrawMind
(For Mac)Click here to download EdrawMind
(For Linux)Social Media Flowchart A perfect demonstration of the decision-making framework, this flowchart can be perfect for cases where different questions are answered over a certain process to be executed by the manager of the process.
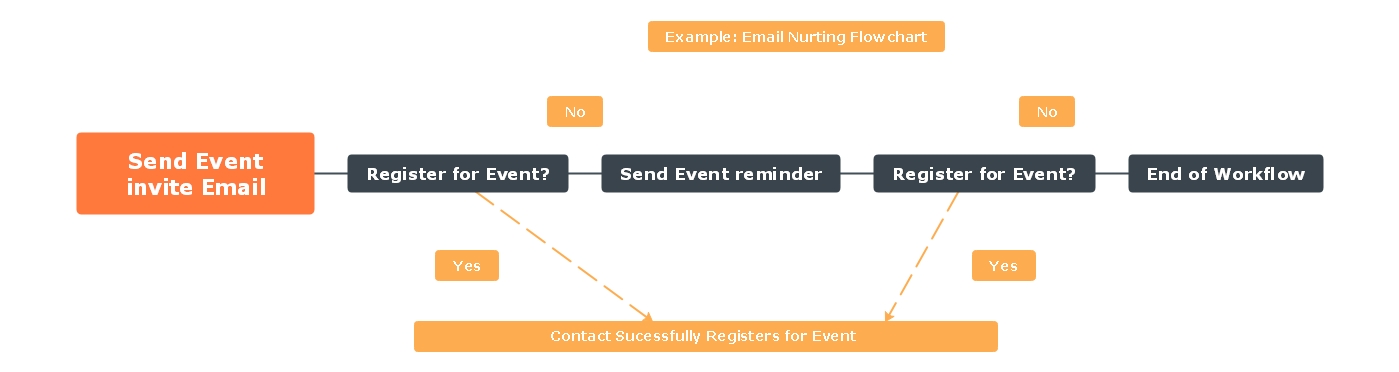
- Email Nurturing Flowchart
![email nurturing flowchart]() Click here to download EdrawMind
Click here to download EdrawMind
(For Win)Click here to download EdrawMind
(For Mac)Click here to download EdrawMind
(For Linux)Email Nurturing Flowchart This is a clear example of a linear flowchart that can be used to explain the single outcome of a process with the right set of directions. Anything that goes astray across a process partition would result in its failure, which is usually perfect for cases with a single sequence of results.
7. Key Takeaways
This article is a clear example of how a user can create perfect flowcharts while developing PowerPoint presentations. Where users face many difficulties in the process, this article has specified the dynamics of how to create a flowchart in PowerPoint.
The use of EdrawMind has clarified a prospected development of intuitive flowcharts. The platform has presented exquisite templates for developing flowcharts, accompanied by a fool-proof performance in its development. Along with that, users can make perfect use of EdrawMind to communicate and collaborate with the other team members to create perfect flowcharts.
You May Also Like
How to Make a Concept Map
HOW-TO & TIPS
Innovative Solutions: Learn How to Brainstorm Like a Pro
HOW-TO & TIPS