How to Create a Flowchart in Word
Edraw Content Team
Do You Want to Create Flowchart?
EdrawMind helps move ideas forward, faster and better. Learn from this guide to know everything about how to create a flowchart. Just try it free now!
Flowcharts are a clear demonstration of the project's key points that are to be answered or covered in a step-by-step process. There are many uses for flowcharts, which can be expressively changed with the change in their chronological order. While developing project guidelines across Word, you usually need to demonstrate the written text through appropriate diagrams.
Flowcharts are conveniently plausible in such cases. However, while working on Word, most users fail to realize how to create a flowchart in Word. This article comes up with a comprehensive guideline on the process of making a flowchart in all ways possible.
1. How to Create a Flowchart in Word?
Microsoft Word is very commonly used for managing word processing tasks. However, it can also be effectively used to create a flowchart. For this, the article proceeds to discuss how to create a flowchart in Word through different methods. Go through the steps to know more about the process:
1.1 Manual Flowchart
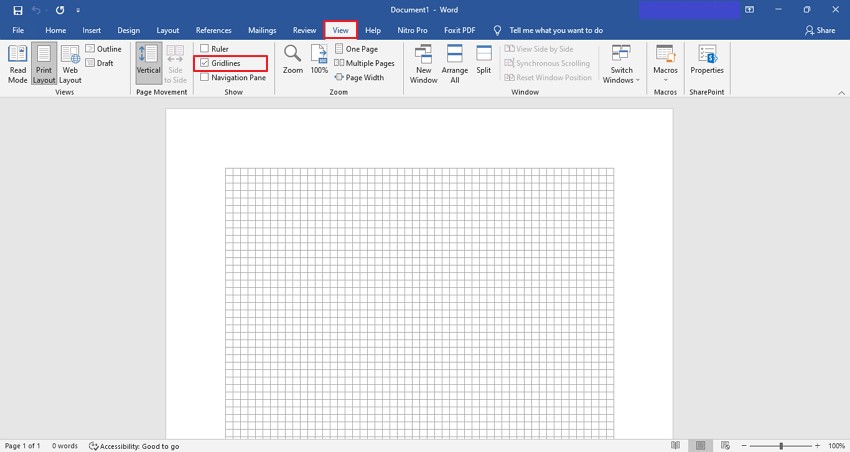
Step 1: Set Up the Grid
To start with the process, open Word on your computer and proceed into the "View" to turn on the option of "Gridlines". This essentially helps in creating the flowchart with better functionality.
Step 2: Add a Shape
Navigate to the "Insert" tab and click on the "Shapes" option to select any particular shape you wish to create the flowchart.

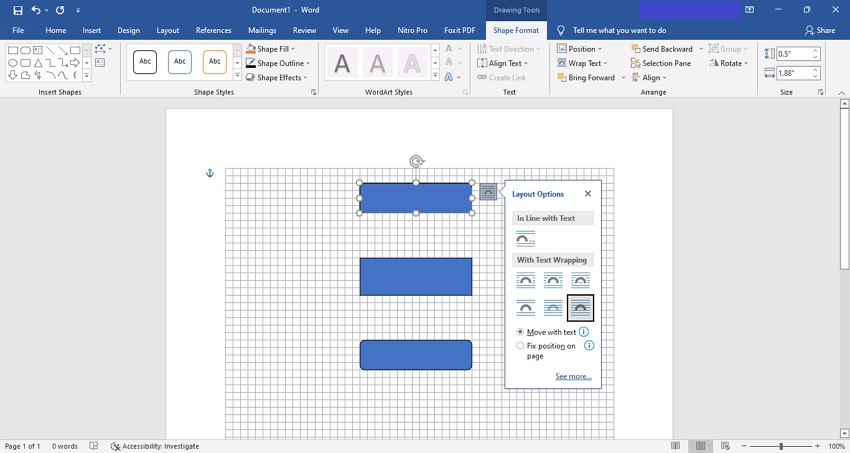
Step 3: Change the Shape Features
After adding the shape, select it and proceed to the "Shape Format" option on the top-most menu. On this menu, you can change the color, border, and several other characteristics of the particular shape.
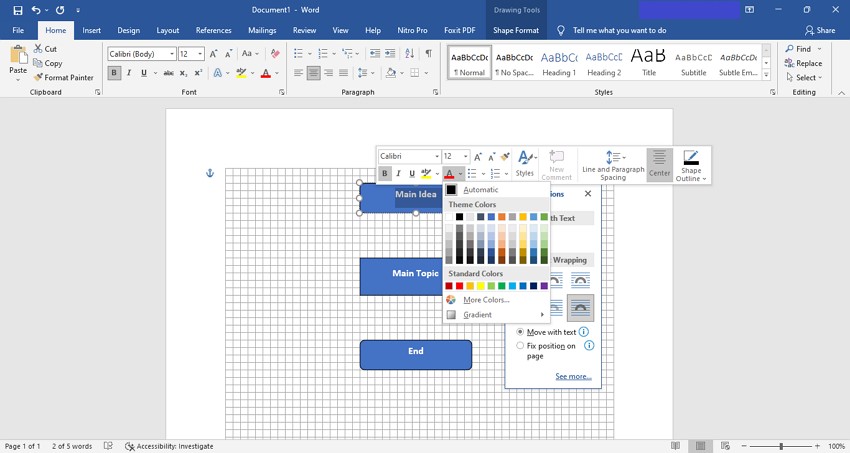
Step 4: Add Text and Edit
Select and double-click the shape to add text across it. You can select it and proceed into the "Home" tab to change the font size, color, and style according to your desire.
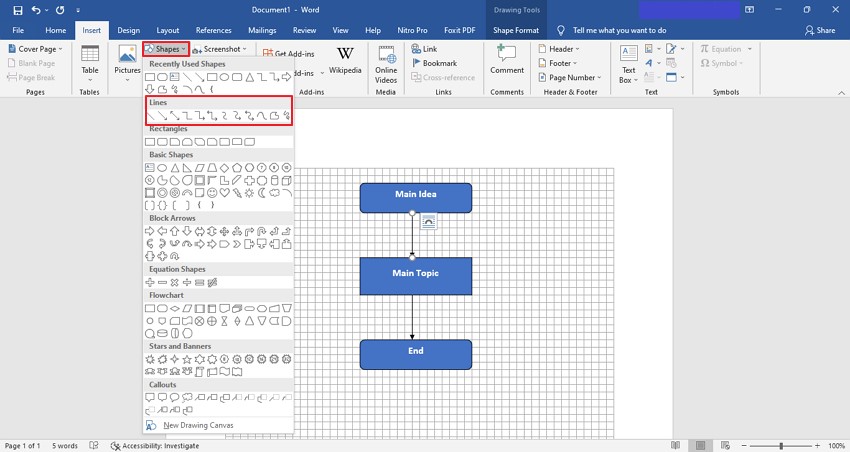
Step 5: Include Connectors to Flowchart
Once you have designed the necessary shapes for the flowchart, move to the "Insert" tab and select the "Shapes" option. Select the line or arrow from the list and draw it in-between the shapes that would act as connectors to the flowchart.
1.2 SmartArt Flowchart
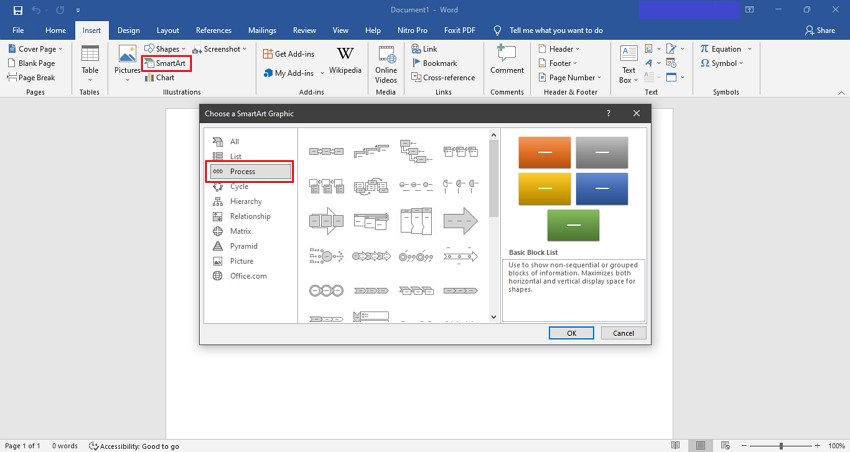
Step 1: Add Template from SmartArt
Open a Word document and proceed into the "Insert" section to start with the process. Select "SmartArt" from the available options and find out the flowchart you wish to include across the "Process" category.
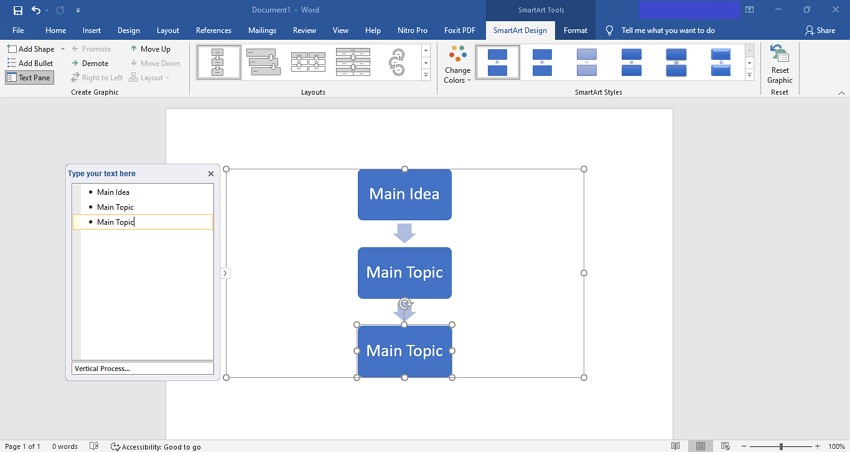
Step 2: Include Text for Flowchart
We have added Vertical Process as the template for the flowchart. Add text across the text pane that appears alongside the template.
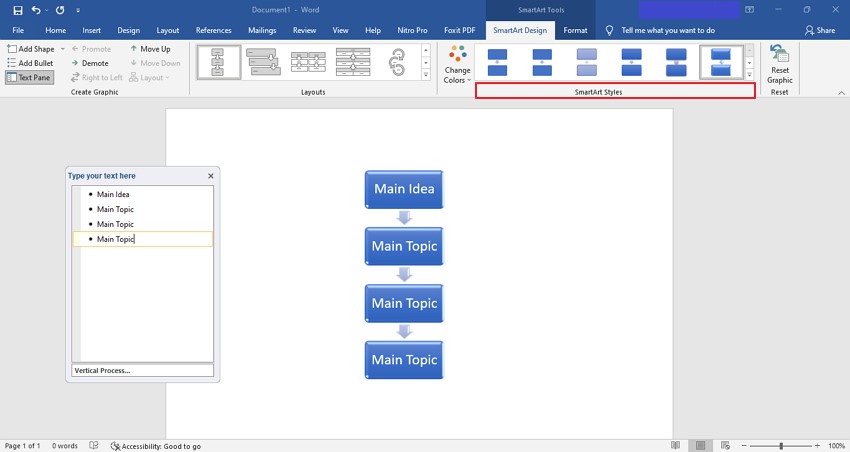
Step 3: Change Style and Add Blocks
If you want to add a block to the flowchart, click on the shape where you wish to add and tap "Enter." Use "Tab" on your keyboard to add a sub-topic across your flowchart where required. After setting up the structure, you can simply proceed to the "SmartArt Styles" section to change the style of the flowchart, if necessary.
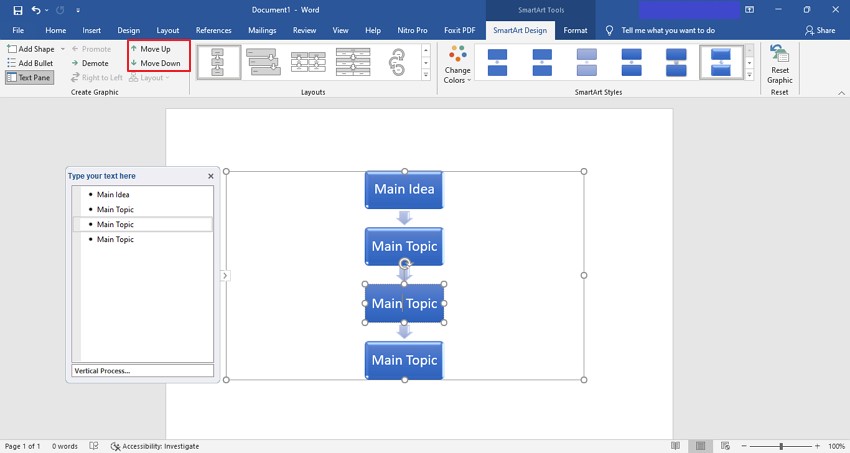
Step 4: Change the Structure of the Flowchart
You can also change the structure of the flowchart if required. Find the option of "Move Up" and "Move Down" in the "Create Graphic" section for making changes in the structure of the flowchart.
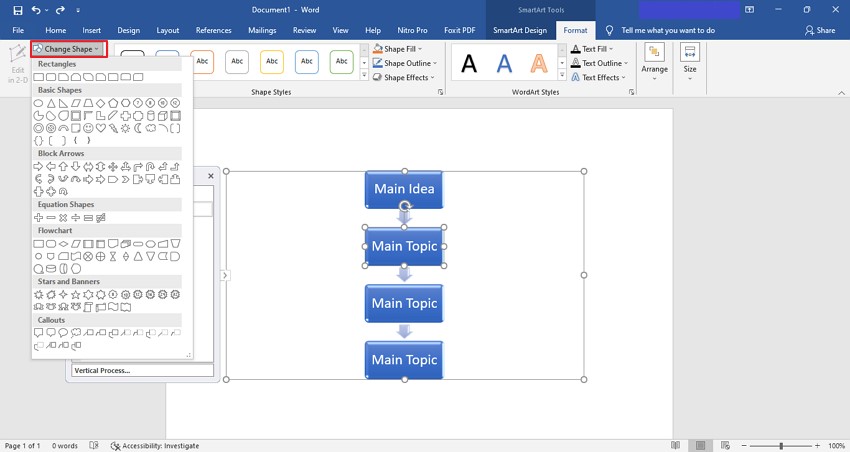
Step 5: Change Shapes of Flowchart
To change the shape of any particular block of the flowchart, click on the shape and proceed to the "Format" tab. Select the "Change Shape" option and make any particular change to the shape you want.
2. Limitations of Using Word to Create a Flowchart
Creating a flowchart across Word can be quite tedious. While working on your project on Word, you may have discovered that there are certain limitations that you've come across. As we answer the question of how to create a flowchart in Word, it is necessary to look into the concerns that are associated with it:
- You need to invest a significant amount of time in your project in creating the template. A flowchart with many steps would be the most difficult task that may seem difficult to complete the project.
- Flowcharts across Word are not beginner's work. If you are working across a flowchart and have to make a small change in its structure, you are bound to manage every block or section of the flowchart. Word offers negligible flexibility while working on the flowchart.
- If there are multiple flowcharts to cover, there is no certain collaborative element available across Word that can help you work with your team over the same project. Your team can't join the process, which does not help in saving time.
3. How to Create a Flowchart in EdrawMind
EdrawMind makes sure that its user does not face the problems one may face using Microsoft Word for creating a flowchart. The tool has been exceptionally designed to feature an environment that can help everyone create a flowchart with ease.
The interface is commendable, which makes sure that the user saves time in executing the process. To know more about the steps of creating a flowchart across EdrawMind, you need to focus on the following:
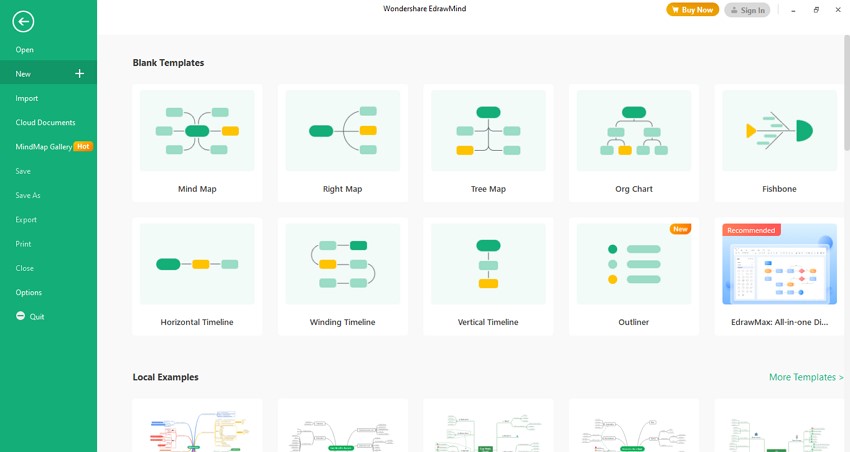
Step1 Selecting the Template
Ensure that the latest version of EdrawMind is downloaded and installed on your computer. Launch the tool and select the flowchart template you wish to work with.
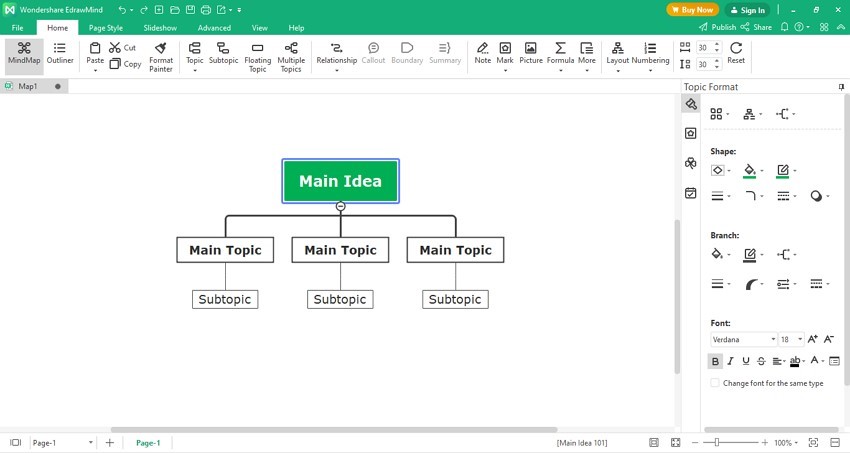
Step2 Editing the Flowchart Template
As soon as a window opens up on the screen, initiate the changes across your template. If you are looking forward to adding a Topic or a Sub-topic to your flowchart, you need to know the respective buttons. Tap "Enter" to add Main Topic across your flowchart. You need to click on "Tab" if you are looking forward to adding a Sub-topic to any Main Topic on the flowchart.
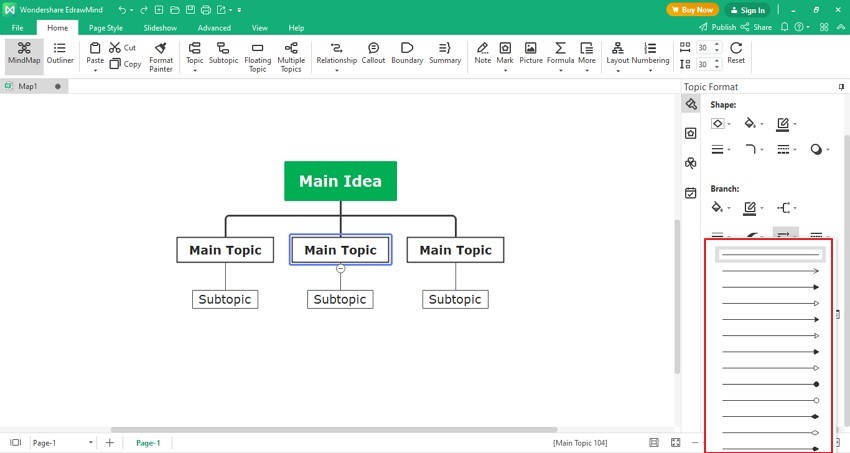
Customize the template with the help of the tool's essential features. If you wish to change the arrowheads between the flowchart blocks, select the specific tab and navigate to the "Branch arrows" option in the "Branch" section on the right-hand column. You can change the flowchart's arrowhead to any arrow or branch available in the list.
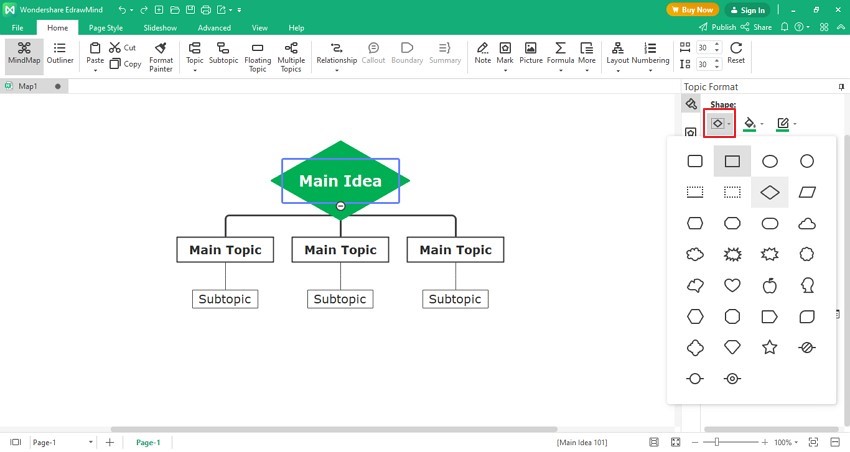
To change any specific shape across the flowchart, select the block you wish to change and proceed to the "Shape" section. Find out the required shape from the menu that you want to replace. EdrawMind also provides its users a "Floating Topic" option for adding it across the flowchart. Double-click on the canvas to create a floating topic.
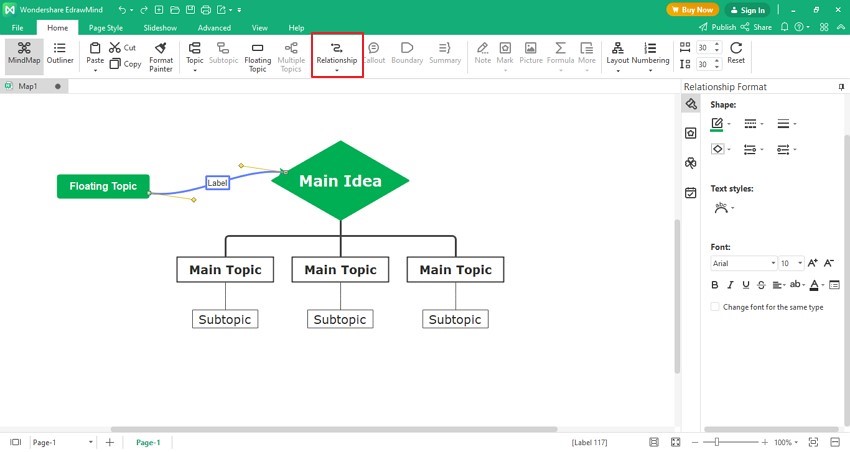
Select the newly-created Floating Topic and proceed to "Relationship." Tap on the other section where you are looking forward to building a relationship. Specify the relation in the "Label" option provided on the window.
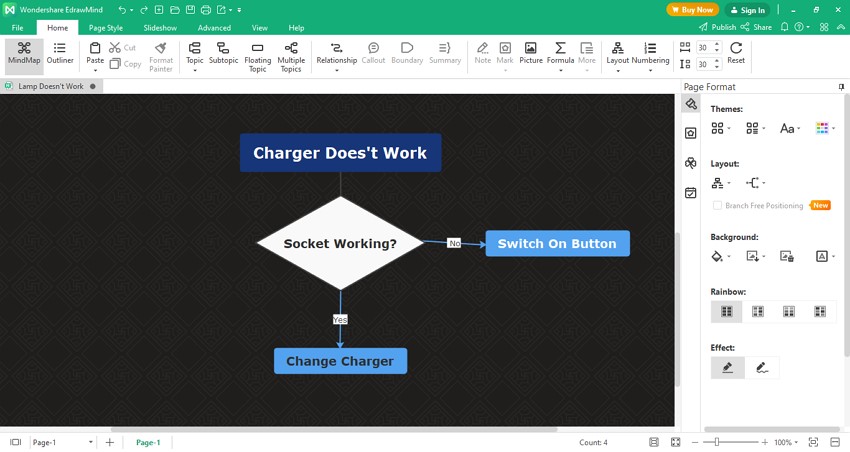
Step3 Changing Themes
Along with making other significant changes to your flowchart, you can also change its style properly. Unselect the flowchart and find "Themes" in the right-hand column. You can select any respective theme on the drop-down menu that you wish to change to.
4. Save an EdrawMind Flowchart as Word File
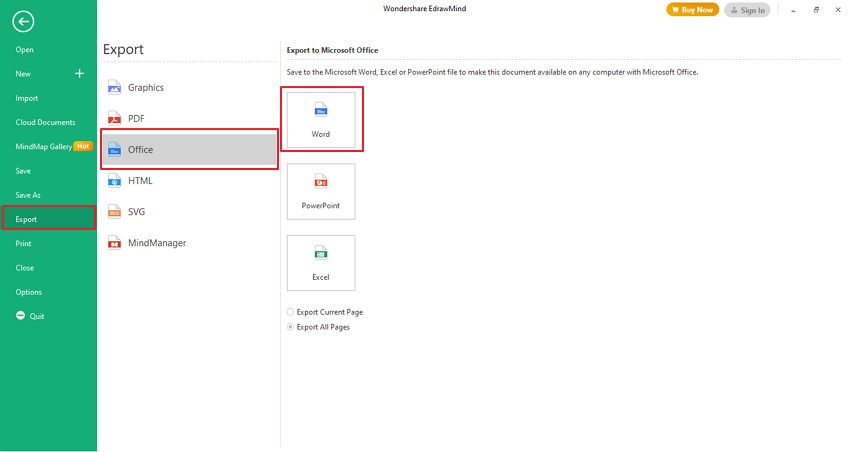
On completing the flowchart, move forward to the "File" tab and locate the "Export" option across the left-hand column. On the options on the screen, click "Office" followed by "Word" to save the flowchart as a Word file on the computer.
5. Templates of Flowchart in EdrawMind
You can consider multiple templates to set up a flowchart across EdrawMind. These templates can help you cover your tasks in a short period with the best options available on the platform. The following examples provide you with how a perfect flowchart can be created across EdrawMind:
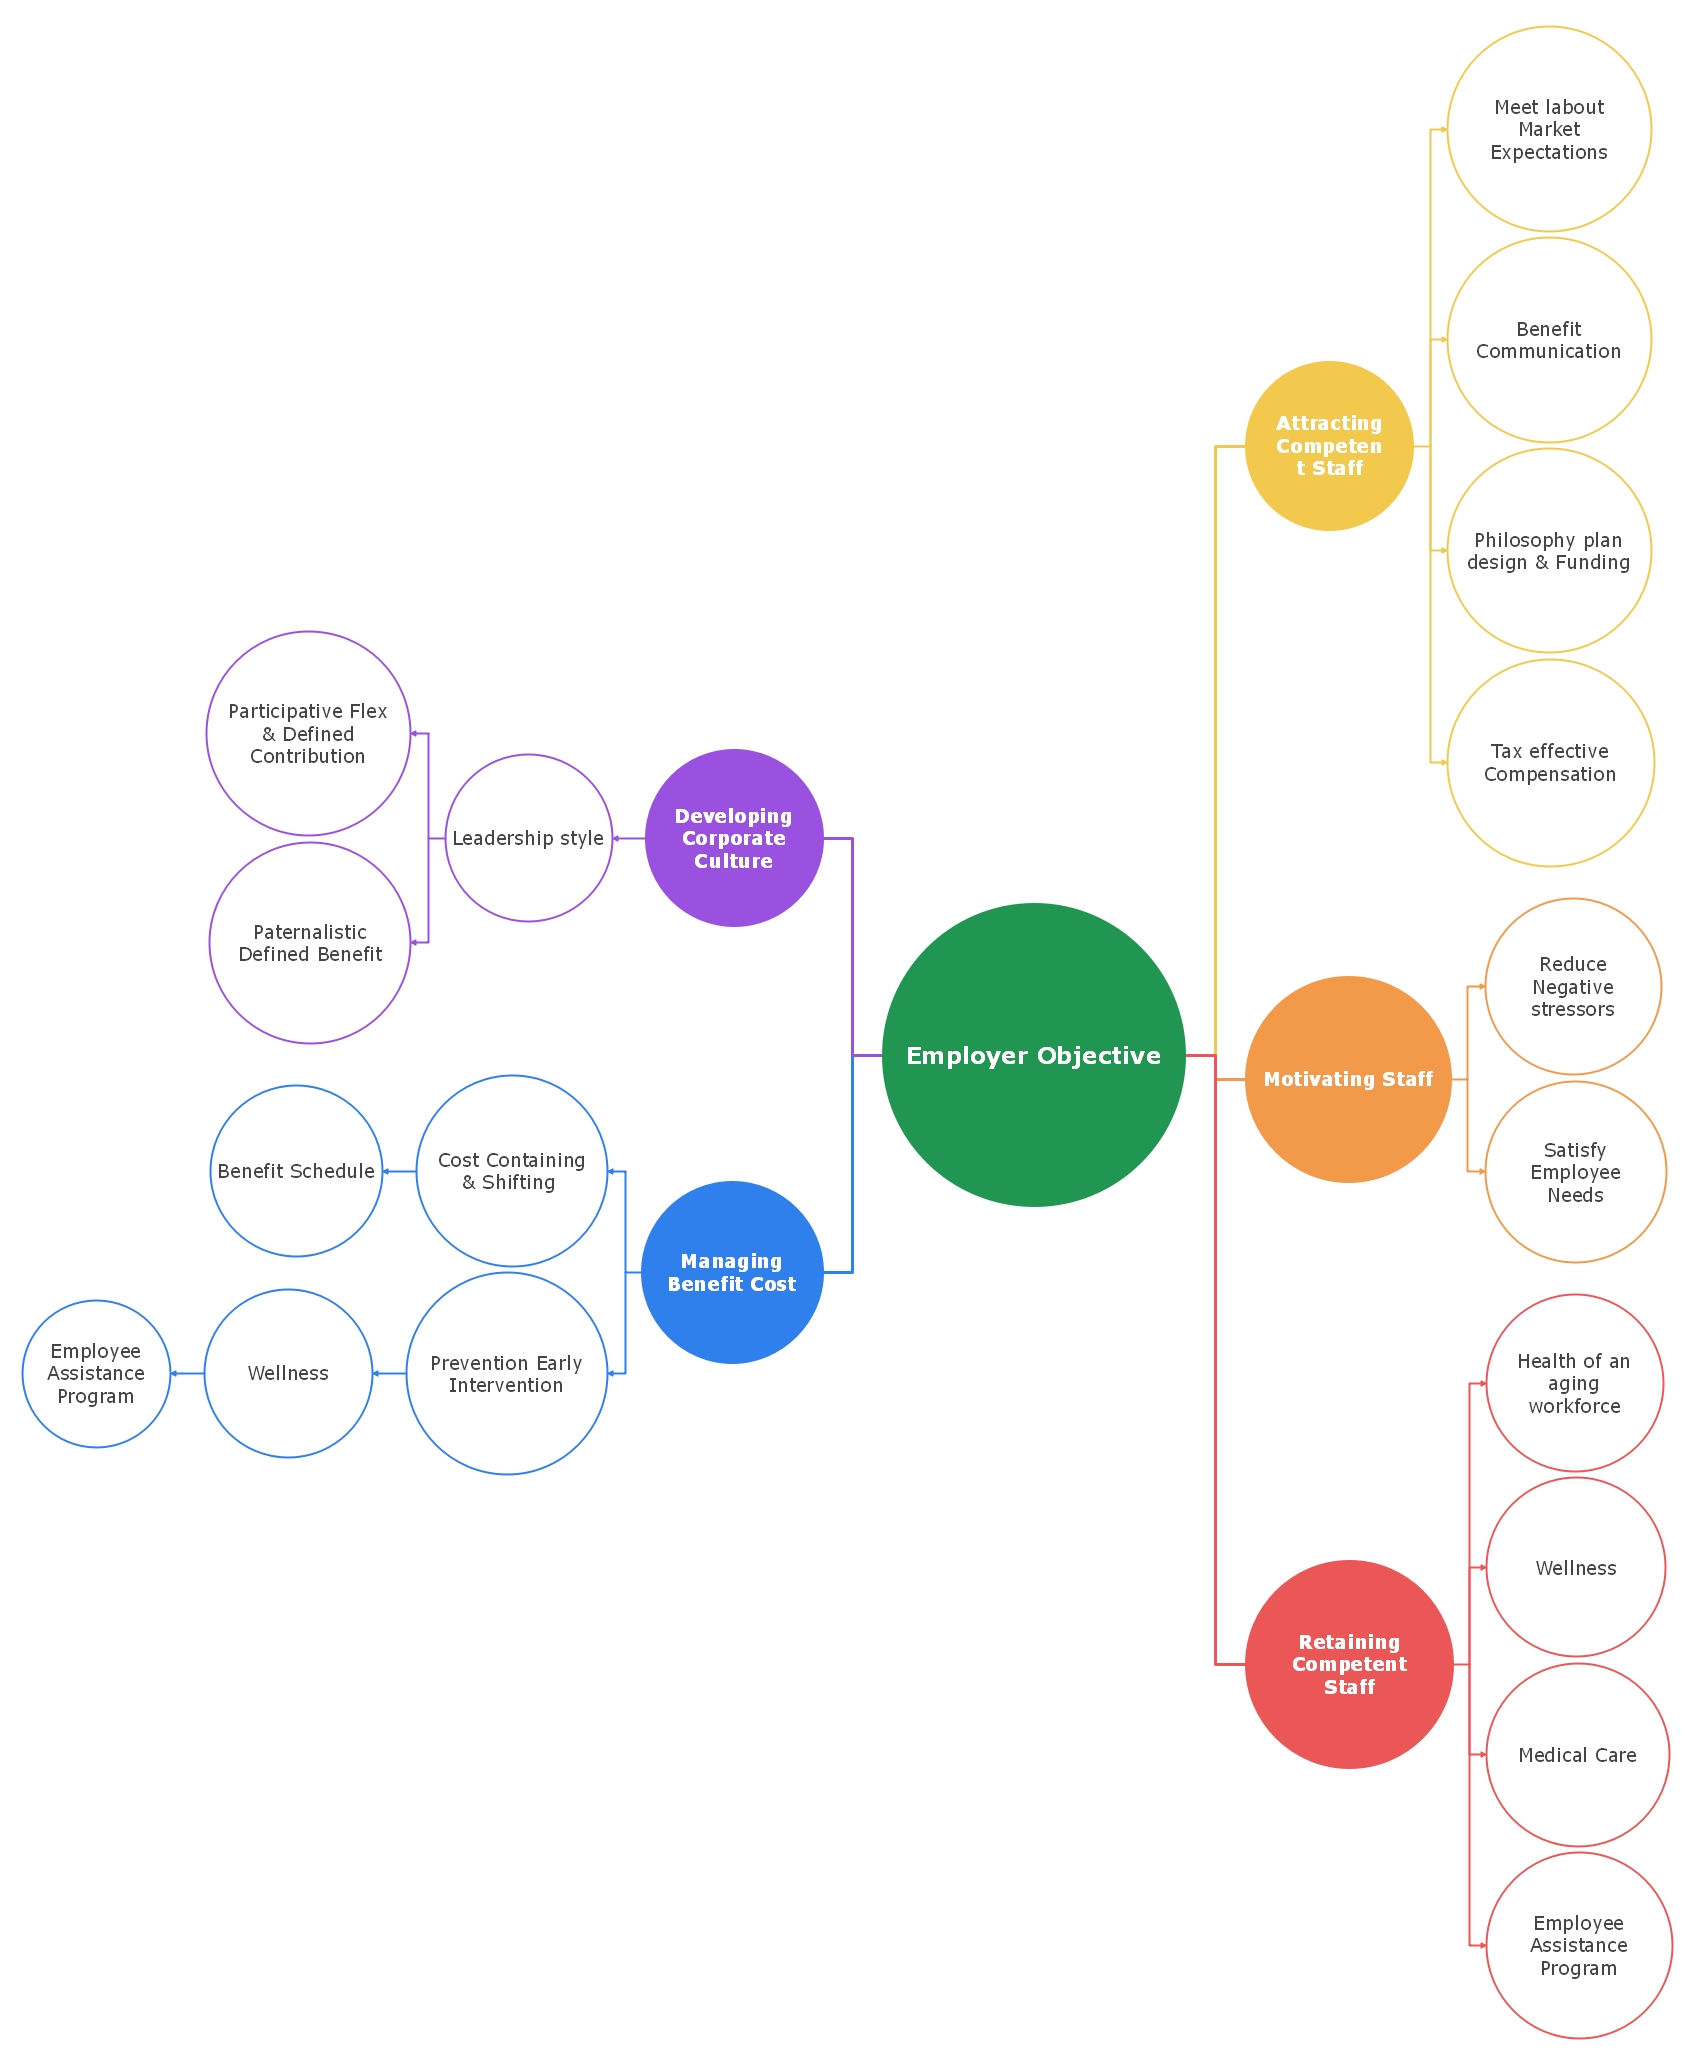
- Bubble Diagram
![bubble diagram]() Click here to download EdrawMind
Click here to download EdrawMind
(For Win)Click here to download EdrawMind
(For Mac)Click here to download EdrawMind
(For Linux)Bubble Diagram

What would be better than a bubble diagram when comparing concepts on a flowchart? A bubble diagram makes itself the perfect flowchart if a diversity of ideas are to be discussed in the flowchart. Along with that, this diagram is highly popular among people belonging to the field of product development.
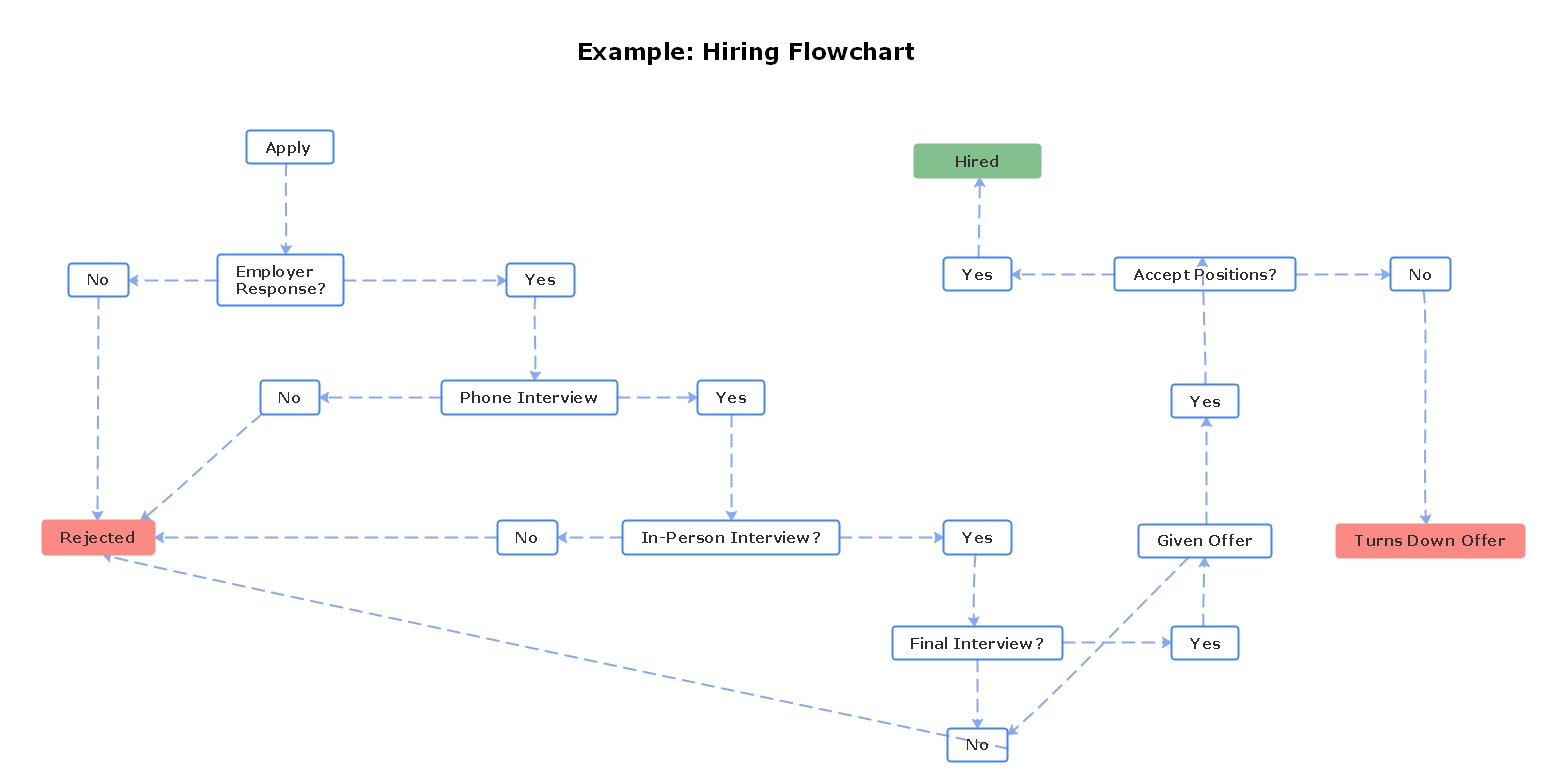
- Hiring Flowchart
![hiring flowchart]() Click here to download EdrawMind
Click here to download EdrawMind
(For Win)Click here to download EdrawMind
(For Mac)Click here to download EdrawMind
(For Linux)Hiring Flowchart These flowcharts hold significance in cases with multiple outcomes from a single event. With such potential outcomes upholding over a process, the use of such a flowchart seems optimal. This demonstrates a complex flowchart that is differentiated through colors and blocks of different sizes, showing the importance of every step that goes through in the process.
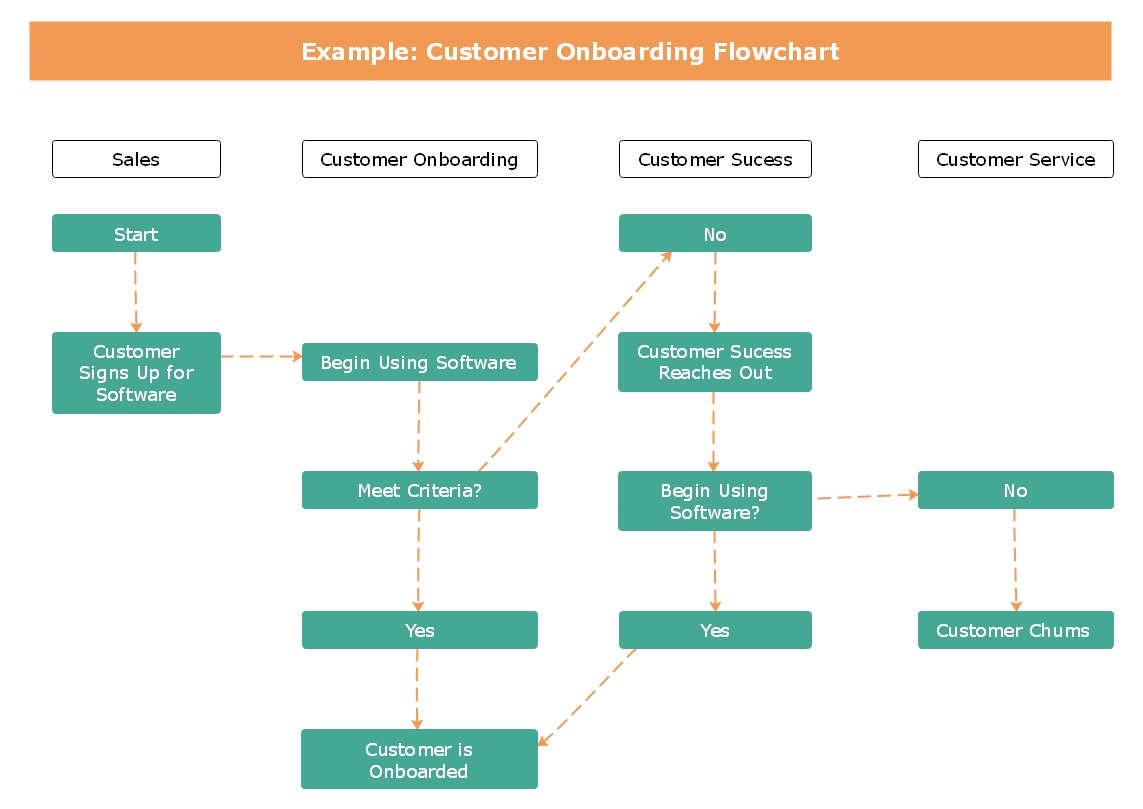
- Customer Onboarding Flowchart
![customer onboarding flowchart]() Click here to download EdrawMind
Click here to download EdrawMind
(For Win)Click here to download EdrawMind
(For Mac)Click here to download EdrawMind
(For Linux)Customer Onboarding Flowchart Another great example of developing flowcharts, this design is differentiated and divided into departments. These departments, however, are connected in the procession of the task, which is quite important to help people understand the chronology of the order. While outlining the roles of every department in the flowchart can help specify if the process is planned in the right form.
6. Key Takeaways
After going through the mentioned details, the user will be quite known with the process of how to create a flowchart in Word. With a clear distinction over the limitations in using Word, the user has been proficiently introduced to EdrawMind, an exceptional alternative that can be used to develop the perfect flowcharts. Talking about EdrawMind, the tool makes sure that the user can develop an environment of collaboration with their team.
While being supported with proficient templates outlined in different categories, the user is free to move their blocks of the flowchart without compromising the overall structure of the flowchart. This is what makes it the best choice to create a flowchart.
You May Also Like
Creating Mind Maps With AI: A Quick Step-by-Step Guide
HOW-TO & TIPS
Creating a SWOT Analysis Chart With EdrawMind AI
HOW-TO & TIPS
How to Make a Mind Map in Word
HOW-TO & TIPS
How to Open and Edit a Mind Map in Office 365
HOW-TO & TIPS
How to Create a OneNote Mind Map
HOW-TO & TIPS